Thursday 17 December 2015

Henri Cartier-Bresson Research


Henri Cartier-Bresson
August 22nd 1908 - August 3rd 2004

Henri Cartier-Bresson was a french photographer who was an early user of the 35m film. He is often considered the master of candid photography and helped with the development of street photography. 

Henri Cartier-Bresson coined the idea of the decisive moment. This term refers to the split second of genius and inspiration that a photographer has to capture a certain moment. This is what inspired his first book, which he named 'The Decisive Moment' and released in 1952.

Being such a popular photographer, Henri's work took him all around the world, including places such as China, India and the USA. In 1966, he decided to change his focus of photography onto portraits and landscapes. Then, in 1975, he retired and decided to no longer take pictures but returned to painting and drawing.

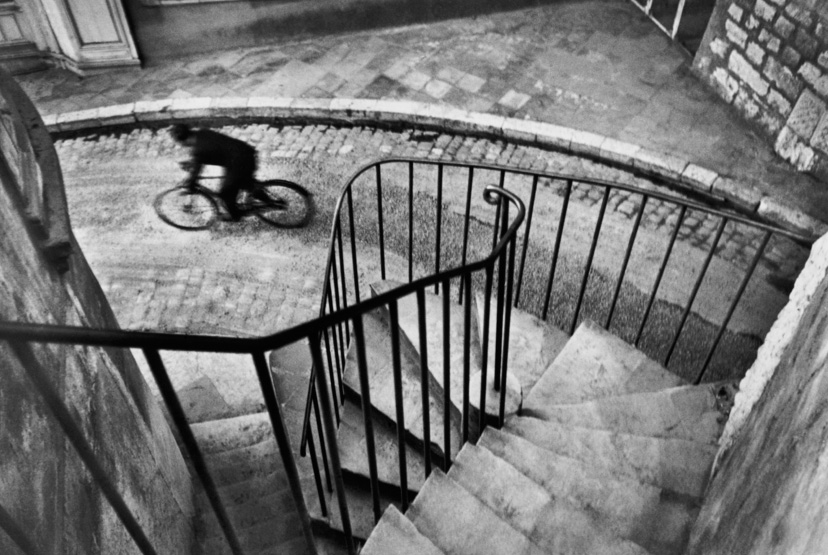
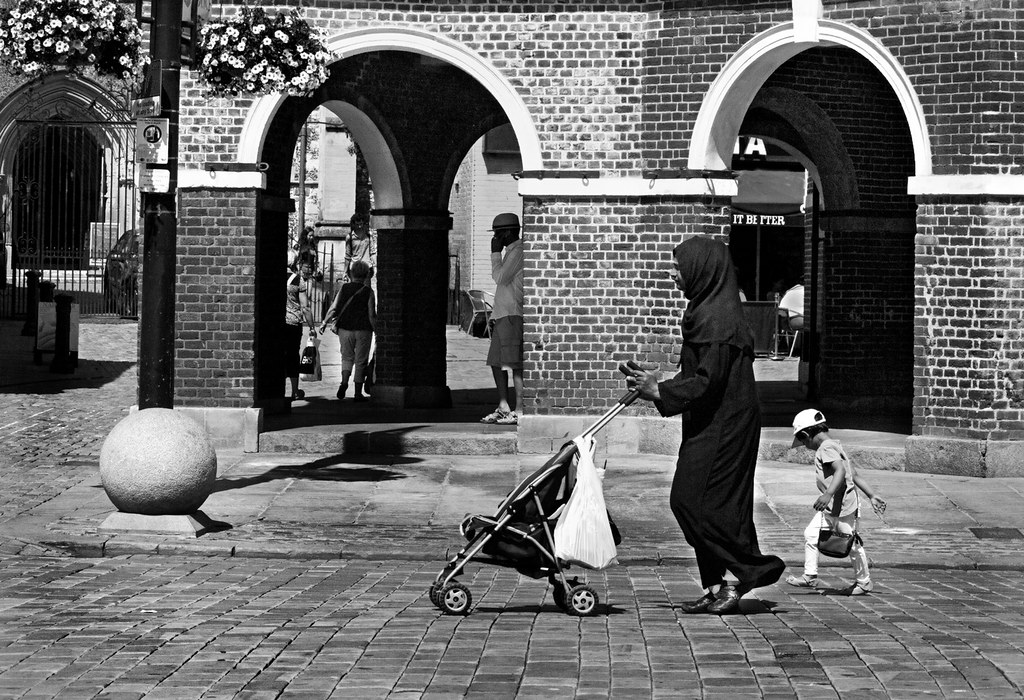
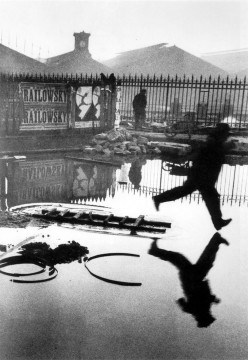
Below are a few examples of Henri Cartier-Bresson's work.


Tuesday 15 December 2015

Photo Documentary - Definiton

Photo documentary: documentary photography is used to chronicle historical events and everyday life. It is often covered in professional photojournalism.

Below are examples of photo documentary:


Lighting - Definitions

Snoot:
A snoot fits over a studio light/portable flash and allows the photographer to have more control the light in terms of direction and radius.

Honeycomb grid:

When the honeycomb is fixed to a studio light, the light shines through and creates a tight beam of light. This will create a focused beam with little diffusion. It is effective in creating little diffusion, but will not create as strong of a beam as the snoot.

Reflector dish:

Usually made of metal, light reflectors direct light in a 90 - 120 degree beam. The wider the dish, the softer the light beam from the lamp.

High key lighting: high key lighting as predominantly light tones. It is often used in beauty images to convey lighthearted moods and create a fun feeling to an image.


Low key lighting: low key lighting has predominantly dark tones. It is used to create mood, mystery and makes skin texture more detailed, adding character to the model.


Friday 4 December 2015

Editing - Sharpen

BEFORE:


AFTER:


EDITING:


Firstly, I went to the filter drop-down menu and selected the 'unsharp mask' tool in the 'sharpen' label.


In the 'unsharp mask' tool menu, brought the threshold down completely as this would only take away any sharpness I added. I then brought the sharpness bar up until I was happy with the sharpness of the image.


I then edited the levels, as this makes the image clearer and therefore sharper.

Wednesday 2 December 2015

Editing - White Balance Adjustment

BEFORE:


AFTER:


EDITING:


Firstly, I opened a new threshold layer and dragged the arrow from the left towards the middle until parts of white began to show. Then, using the colour sampler tool, I selected a part of the white that was showing.

I then opened a curve layer and once it was opened I closed the threshold layer. In the curves layer, I selected the 'black balance' eyedropper. Once I located the point where I used the colour sampler tool, I clicked here. This darkened any points that contained the complete black parts of the image. This would make the white appear brighter.


I repeated this again, but instead slid the arrow on the threshold layer from the right to the middle. Again, I used the colour sampler tool to select a white part of the image. When I had opened the new curves layer, I selected the 'white balance' eyedropper tool, clicking where I had selected the white previously. This whitened any parts of the image that were white-toned, balancing the white in the image.

Editing - Dodge and Burn

 BEFORE:


AFTER:


EDITING:


Firstly, I selected the part of the image that I would use the dodge and burn tools on, as this allows me to only edit this part of the image.


Starting with the dodge tool, I drew over half of her face in three layers - giving a very visible edit. The dodge tool makes the image lighter and gives it a white filter. This could be used to whiten teeth or eyes in a portrait.


I then edited the other half of the face with the burn tool. The burn tool makes the image darker, giving it an almost black filter. This could be used to make a model more tanned, or to darken any parts of an image such as the backdrop or the models clothing.

SECOND EXAMPLE:


In this edit, I used the burn tool on the background to darken it - making the vase appear brighter - and to even out the lighting.

Editing - Levels

BEFORE:


AFTER:


EDITING:


Changed the levels on the images balances out the light, making the image clearer and sharper. When editing levels, I bring the arrows along the bottom of the chart across until they reach the point where light starts to come through to the image (where the shape on the chart begins and ends).


I then move the middle arrow either left of right, to balance out the light to what I would like it to be. This allows an adjustment of contrast in the picture.

Editing - Hue and Saturation

BEFORE: 


AFTER:

<-- DESATURATED IMAGE


      SATURATED IMAGE -->


EDITING:

To change the hue of the image, I slid the arrow along the top bar labelled 'hue' until the colours were one that I liked.


After changing the hue I experimented with changed the levels of saturation. I followed the same instructions as with the hue adjustment, except on the bar labelled 'saturation'. This was the result when I made the image more saturated by increasing it by 40.


This was the result when I decreased the saturation by 40 - the colours have become more muted and the image appears duller than before.

Editing - Curves

BEFORE:


AFTER:


Below is a step-by-step guide on how to create a vignette using the curves and gradient tool.


Firstly, using the curves tool, I brought the line down in order to make the whole picture darker.


After darkening the image, I picked the gradient tool and ensures that the colour selection was on black, as when I drag the gradient to the outside of the image this will create a white glow.


This is the finished result.

Tuesday 1 December 2015

Portraiture - Editing

ORIGINAL: 

EDITING:


Firstly, using the clone stamp tool, I edited the background by going over all of the marks and dirt spots on the backdrop. This cleaned up the image and removed anything that was unwanted from the picture.


Next, I used the levels tool to balance the light in the image. This, again, made it clearer and brighter. This makes it more appealing and removes the grey filter that was over the image. 


I then created a vignette. To do this, I used the curves tool to make the whole image darker, and then used the gradient tool by dragging it from her face to the outside of the image. This brought lightness to her face. By doing this, it darkens everything in the image but her face, therefore bringing more attention to the face.


Using the hue/saturation tool, I took the saturation down to -13. I did this as the colours in the image are already very muted and toned down, so bringing the saturation down compliments this.


Using the clone stamp tool, I decided to remove the stray hairs in order to tidy up the image and make the overall appearance neater. 


Lastly, I brought up the contrast, this make her skin appear brighter and hair appear darker, bringing more attention to her face.

FINAL IMAGE:


EVALUATION:

I like how the overall look of the image is after editing, as it looks sharp and neat. The balance of light is much better after using levels and the contrast tool, making the image clearer and more appealing. But, I do not like how her hair looks after editing as it looks as though she has been cut out of a separate image and placed into this one. So, I have edited the photograph again following the same steps but have skipped the part where I edited her hair. I much prefer this edit as it seems much more natural.